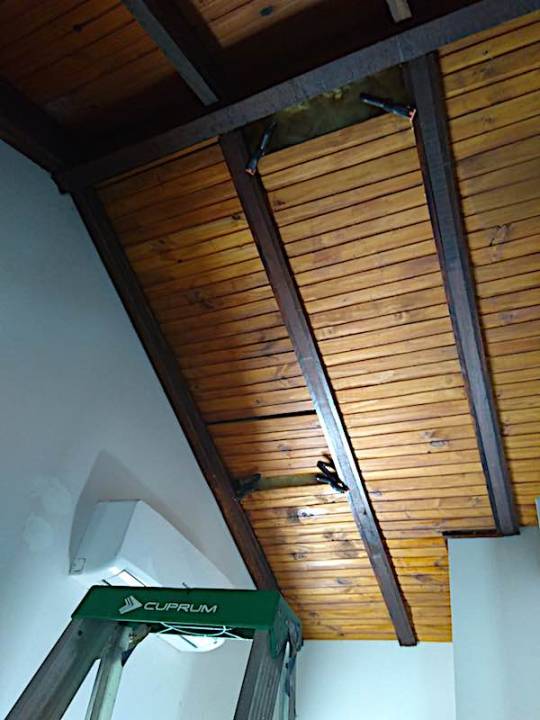
Several years ago, I created a wood-slat drop ceiling with fiberglass insulation on the north (sun) facing roof over our bedroom. With only an extension ladder it was quite precarious and rather scary. Returning Americans gifted us a tall step ladder, and so I’m finally getting around to necessary repairs.
I’ve always liked autumn. “Back to school” was an exciting for me as a kid. New clothes! New faces! New things to learn!
Autumn here is familiar: crisp air, blue sky, bright sun (and a few sort-of-almost-colorful leaves). But northern hemisphere signals persist, and part of me thinks it’s spring cleaning time: focus on clothes, tools, organizing nooks and crannies, passing on unused items.
One morning my little tinkering-space caught my attention. It was trivial to cut a shelf in half to make cans more organized, but what a difference in terms of quickly locating nails and screws. Then it occurred that I had measuring tools scattered in different places. Since most projects start with measuring, I consolidated them:
Now, in the space of a few inches, I have two types of carpenter’s square, calipers, folding rule, measuring tape, and bevel gauge. All that’s missing is the framing square, which remains elsewhere because of its size. Bring it on!
Of course, none of my most recent projects — painting ironwork, pressure washing, disassembling a decrepit table, re-wiring a kitchen stove, reorganizing the patio and repairing masonry — has required any measuring at all. But the next one will, for sure.
As I stood in my little workshop, waiting for glue to set on the fake Crocs from which the puppy removed significant portions, I noticed the laser portion of my printer dissection. I assumed it would need to be broken open, but now picked it up and saw it had four little plastic tabs – piece of cake!
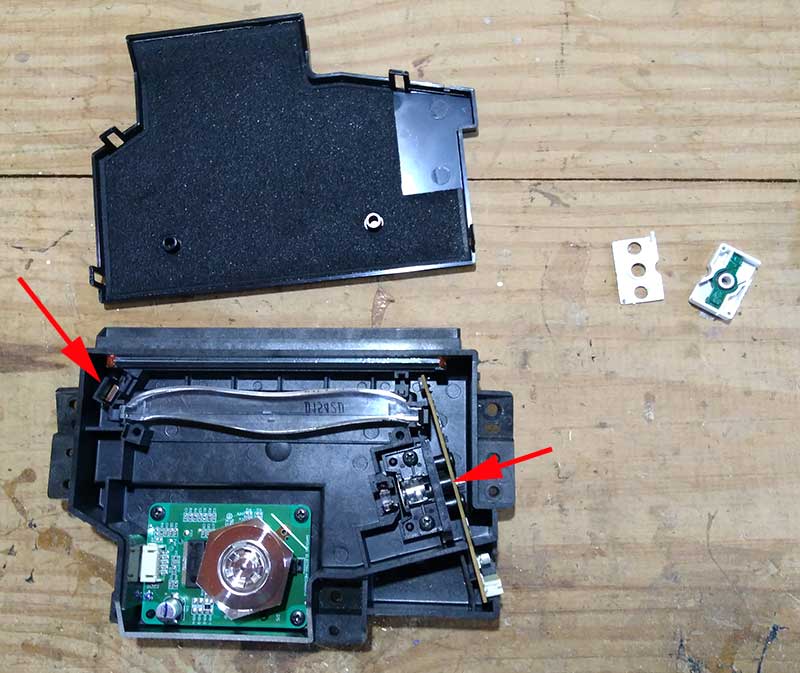
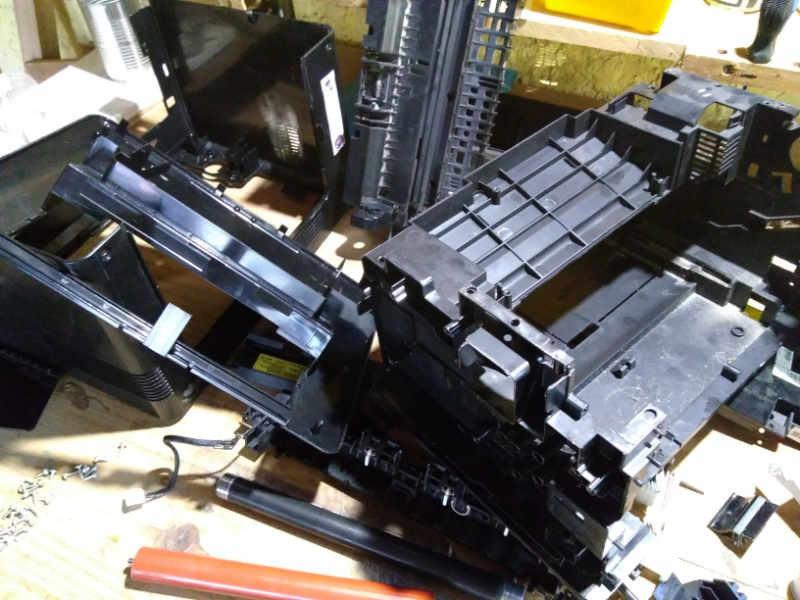
And very cool! The laser is at the arrow on the right. The hexagonal disk has mirrored edges, and is attached to a motor. The bizarrely-shaped plastic lens is obviously very carefully designed to very precisely deliver incredibly tiny dots at incredibly high speed. The arrow on the left points to a tiny mirror whose purpose remains a mystery to me. Amazing technology.
The plastic bits on the right represent a slightly less amazing technology. I was unable to plug in a Schuko plug to an adaptor (maybe the very one labelled C in this post from 2012). I thought I’d take it apart, which it turns out involved breaking it, but the stuck safety gate shown here dropped out. So I glued the broken parts back together, and voilà – another silly little project done.
You may have read my account about dissecting the dead kitchen scale, and maybe thought well, that’s a silly thing to do. And maybe you’re right.
I had pulled my wife’s desk back so I could work on a window, and a certain dog who is not allowed upstairs apparently got upstairs while we were out, went to look out the window, got tangled in wires, and pulled a computer and laser printer from the desk. I immediately ran diagnostics on the computer (a Mac Mini) and it seemed to be fine. The 9 year old printer, on the other hand, wasn’t working right at all.
The local computer place techie looked at it, identified one part was cracked and basically not replaceable. So I had two challenges: 1) find another printer, and 2) take this one completely apart without breaking anything.
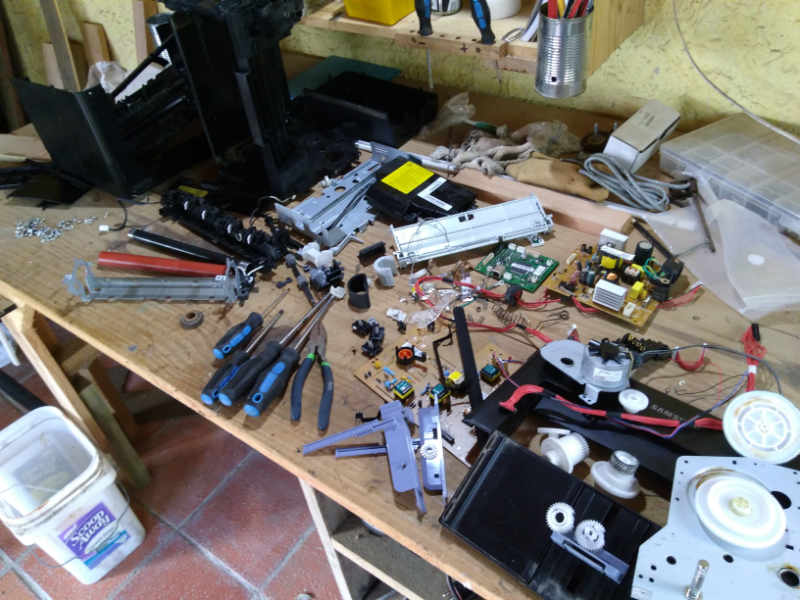
68 screws, 17 springs, and 12 gears later, it was done! The heating element (black and red rollers to the left) was the single most difficult challenge. Amazing the ingenuity that goes into putting pieces together – little tabs, rotate this, pry back that….
The number of springs surprised me. I did break a couple of small pieces of plastic, but on purpose to save time, not because I couldn’t figure out their assembly.
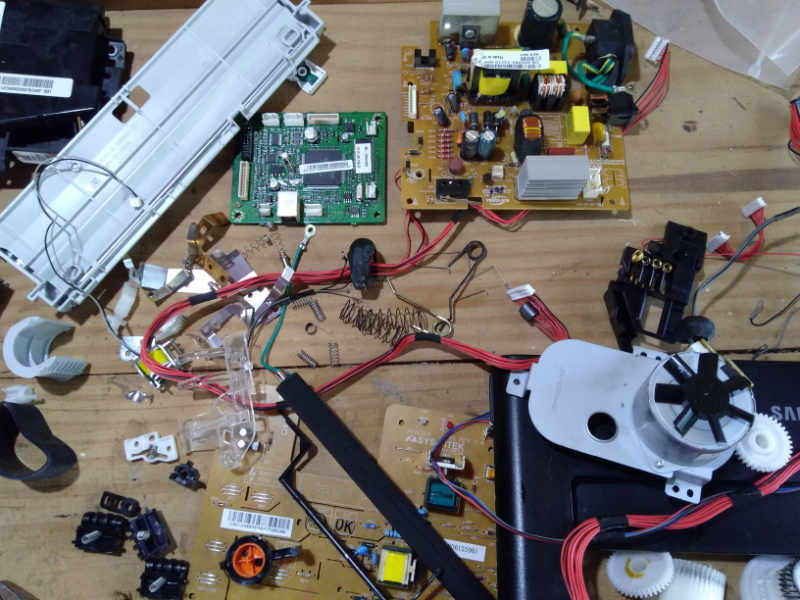
The carcass
In addition to admiring the design and engineering wizardry, I can hardly imagine how they created the incredibly intricate molded plastic parts.
As with the kitchen scale, there’s nothing particularly useful for other projects, though I’ll save some of the bits of wire and springs, and chuck the rest.
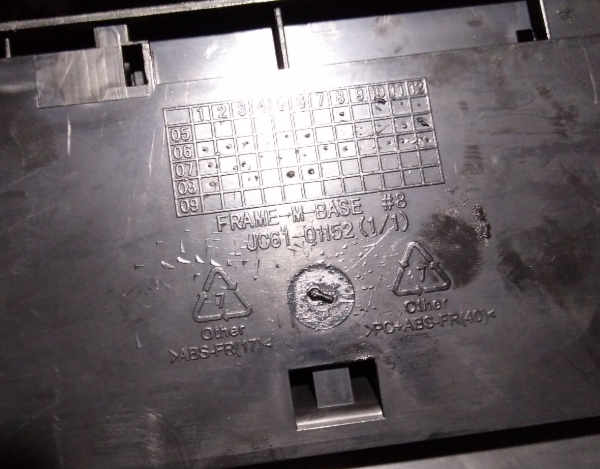
But wait! I see at the large plastic pieces are identified as ABS for recycling (acrylonitrile butadiene styrene, but you knew that). So in addition to having a fun hour or so, disassembling the printer allows for recycling at least some of it (bits of aluminum as well) that otherwise would have gone to a landfill.
And oh by the way, I found no evidence of a crack or break in the part the techie indicated. But it doesn’t matter: the printer no longer worked, and wasn’t about to get fixed.
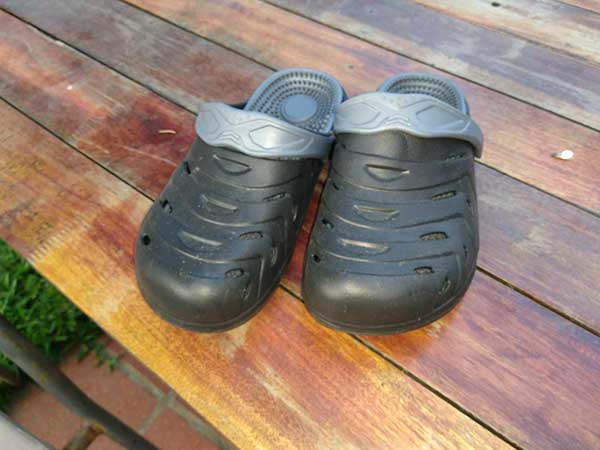
This is a pair of fake Crocs my wife bought at Géant for a few bucks. They turned out to be just a half size too small for comfort.
And she prefers open-toed shoes for summer.
All it took was a few minutes with a razor blade and voilà!
Do they sell razor blades in Uruguay? I have no idea. I almost didn’t bring these from the United States. I’ll explain.
When we flew to New York in 2012 for my niece’s wedding in Connecticut, we had offered to bring an absurd amount of stuff back to Uruguay for people.* My last-minute packing operation occupied a significant part of my sister’s living room floor. I kept reassigning goods to different suitcases. It took a while, but finally everything fit.
But just before we headed out the door for the airport, I suddenly realized I needed one more item reassignment…
…because going through airport security with two box cutters and 100 razor blades in my carry-on bag didn’t seem like something that was going to end well.
I bought a hand truck (dolly) a couple years ago from some departing Americans. They warned that one of the tires loses air over time, an issue I tried to deal with a couple times at local tire places. Eventually, though, to no avail. With no inner tube, you can’t get air back in with something as slow as a bicycle pump.
So I brought an inner tube back from the US, since I happened to be going and was an easy add-on to an existing free-shipping order.
It took a bit of work to get the tire lose, and then putting the tube in was no big deal. But getting the tire back on? Impossible!
Then I found this wonderful video. My solution! But I needed some C-clamps, which understandably are called “G” clamps here.
So I immediately set to work with them, and …
… *sigh* later I’ll be taking the hand truck to the local tire place, to see if they have a way to get the tire over the rim.
The “G” clamps will prove themselves useful in other ways, no doubt.
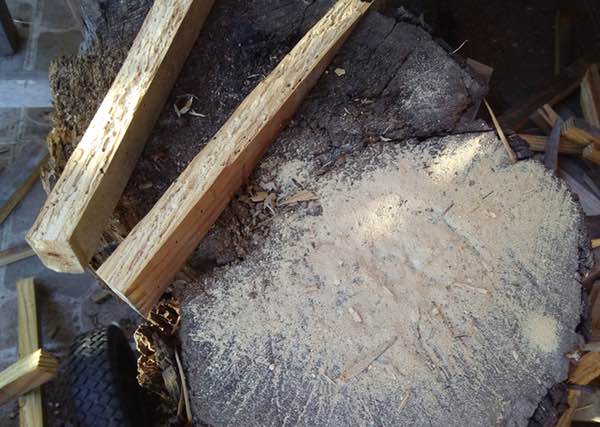
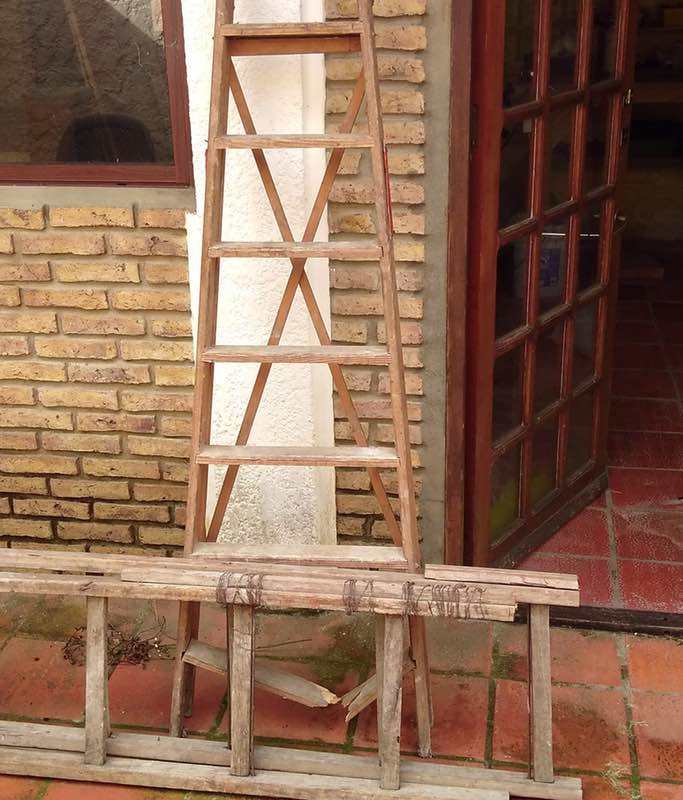
Just in case you were wondering if the ladders were really that bad, look at what was left on the chopping block after splitting seven steps from one into kindling.
As you can see, much of the inside of each step has been turned to dust.
It reminds me of buying new rustic furniture in Mexico. Within days, you’d find coin-sized perfectly round mounds of incredibly fine wood dust on the floor beneath it, and have to apply some horridly toxic liquid to every square inch of its surface to kill all the tiny critters.
For over a month now, I’ve been supervising repairs on a house whose American owners haven’t been here in six years. The caretaker died of cancer a couple years ago. Leaving a house unmaintained is bad anywhere, but with the humidity, really bad in Uruguay.
Today I brought home two ladders (one on the ground cut in two pieces to fit in the car). The vertical one is completely ruined by bugs — notice the bottom rung, broken from just a little weight.
The one on the ground is equally scary. All that wire desperately wound to hold the thing together. That could be ten years old. More likely 15 or 20. Or more: the house was built in the 1960s.
Astillas? Kindling. My next fun-with-dangerous-power-tools project!
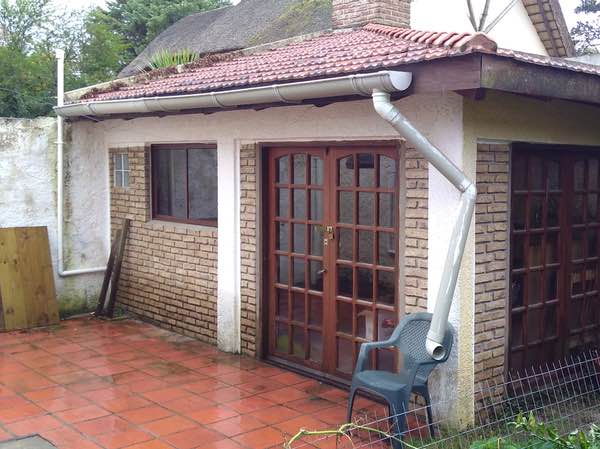
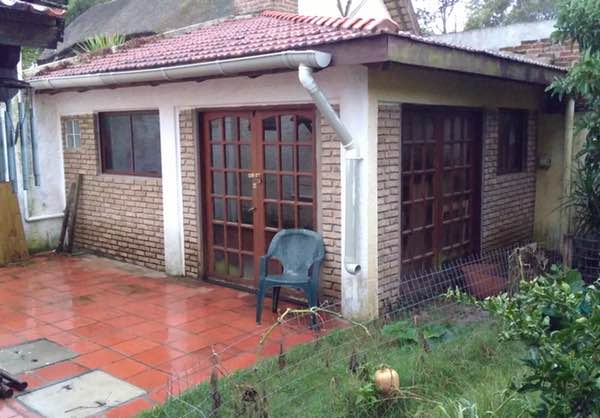
Several years ago, a departing northerner gave me a short length of plastic gutter, hangers, and a couple other pieces which I installed on our barbacoa. Recently I’ve been inspired — mostly by the unexpected gift of an extra 3-meter gutter section by apparently incompetent employees in a local business that I’m told is a front — to expand it to the full length of the barbacoa. With rain coming yesterday evening, I was eager to get it put together.
This is a little better, but I’m still not finished. Despite finally learning how to drill holes in walls correctly, I must have hit iron inside the concrete column on one side, so the bracket is more decorative than functional at this point. And maybe I need to splurge on another hanger for the downspout end. Oopa!
Why does the downspout end at knee level, instead of ground level? Well, to paraphrase Donald Rumsfeld, — no, I really don’t want paraphrase that hideous creature who unleashed the neurotoxin aspartame on the world — let’s just say “I worked with what I had.”
A few years ago, I looked into buying replacement plastic door shelves for our Bosch (not a good brand when licensed to Brazilians, unfortunately) refrigerator, and they were available from a place in London. I put it off, though, and discovered a year or two ago that they are no longer available for our model. Uh-oh.
But our refrigerator guys were here at some point last year installing a DC split (heating/cooling) unit in our bedroom. DC because a DC motor can be variable speed, unlike AC, so you don’t get crazy noise, and temperature fluctuations. This is helpful if, for example, you’re trying to sleep. We put the previous unit downstairs in the dining room, where it performs admirably despite its diminutive size.
I asked the refrigerator guys about the plastic door shelves. And as an aside pointed out the long dent in the side of the refrigerator that had appeared after they removed it for repairs, a year or three before. The more senior of the two, in his 30s, was horrified at that revelation and offered to fix the shelves for free with epoxy. Can’t complain!
Well, yes, actually can, even for a free job, where a few days turns into a few weeks, and we have to wait a few further weeks for the sticky epoxy to set, since apparently mixing equal amounts of Part A and Part B (thoroughly) presents challenges I am unable to fathom.
Alas, yesterday we realized that the bottom shelf was falling apart, probably because it’s the recipient of the heaviest loads. I consulted with Nico, font of knowledge specializing in the Uruguayan knack of fixing anything with anything, and he suggested I heat plastic with a candle to bend it. (Last time I heated plastic to bend it was around 1974, working in a screen printing shop and making little countertop displays.) I had leftover acrylic from fixing shattered glass in a door window in a casita where a certain muchacho lived for several years, and it worked like a charm. Well, excepting soot.
Of course this involved fun with dangerous power tools, in this case my table saw with all safety “features” removed immediately. I marked the depth of each tab cut with a marker. The only problem I had was lifting one tab to put epoxy underneath. It was tight and broke. But there are ten others that “have its back.”