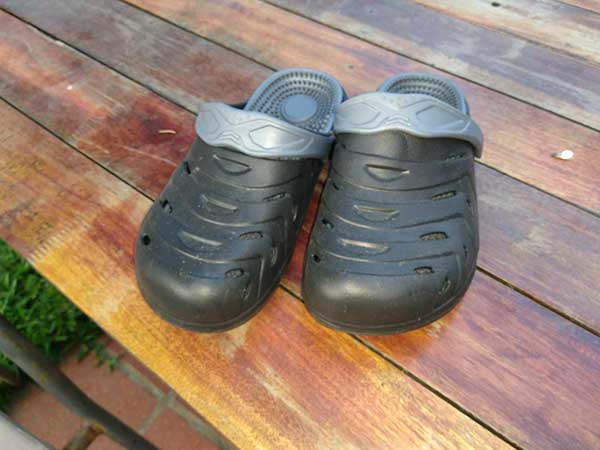
This is a pair of fake Crocs my wife bought at Géant for a few bucks. They turned out to be just a half size too small for comfort.
And she prefers open-toed shoes for summer.
All it took was a few minutes with a razor blade and voilà!
Do they sell razor blades in Uruguay? I have no idea. I almost didn’t bring these from the United States. I’ll explain.
When we flew to New York in 2012 for my niece’s wedding in Connecticut, we had offered to bring an absurd amount of stuff back to Uruguay for people.* My last-minute packing operation occupied a significant part of my sister’s living room floor. I kept reassigning goods to different suitcases. It took a while, but finally everything fit.
But just before we headed out the door for the airport, I suddenly realized I needed one more item reassignment…
…because going through airport security with two box cutters and 100 razor blades in my carry-on bag didn’t seem like something that was going to end well.
I bought a hand truck (dolly) a couple years ago from some departing Americans. They warned that one of the tires loses air over time, an issue I tried to deal with a couple times at local tire places. Eventually, though, to no avail. With no inner tube, you can’t get air back in with something as slow as a bicycle pump.
So I brought an inner tube back from the US, since I happened to be going and was an easy add-on to an existing free-shipping order.
It took a bit of work to get the tire lose, and then putting the tube in was no big deal. But getting the tire back on? Impossible!
Then I found this wonderful video. My solution! But I needed some C-clamps, which understandably are called “G” clamps here.
So I immediately set to work with them, and …
… *sigh* later I’ll be taking the hand truck to the local tire place, to see if they have a way to get the tire over the rim.
The “G” clamps will prove themselves useful in other ways, no doubt.
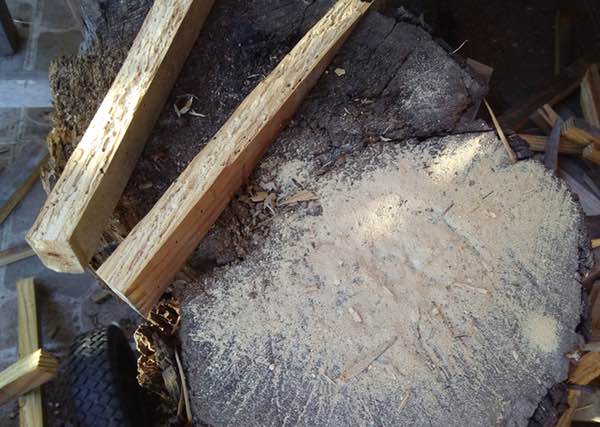
Just in case you were wondering if the ladders were really that bad, look at what was left on the chopping block after splitting seven steps from one into kindling.
As you can see, much of the inside of each step has been turned to dust.
It reminds me of buying new rustic furniture in Mexico. Within days, you’d find coin-sized perfectly round mounds of incredibly fine wood dust on the floor beneath it, and have to apply some horridly toxic liquid to every square inch of its surface to kill all the tiny critters.
For over a month now, I’ve been supervising repairs on a house whose American owners haven’t been here in six years. The caretaker died of cancer a couple years ago. Leaving a house unmaintained is bad anywhere, but with the humidity, really bad in Uruguay.
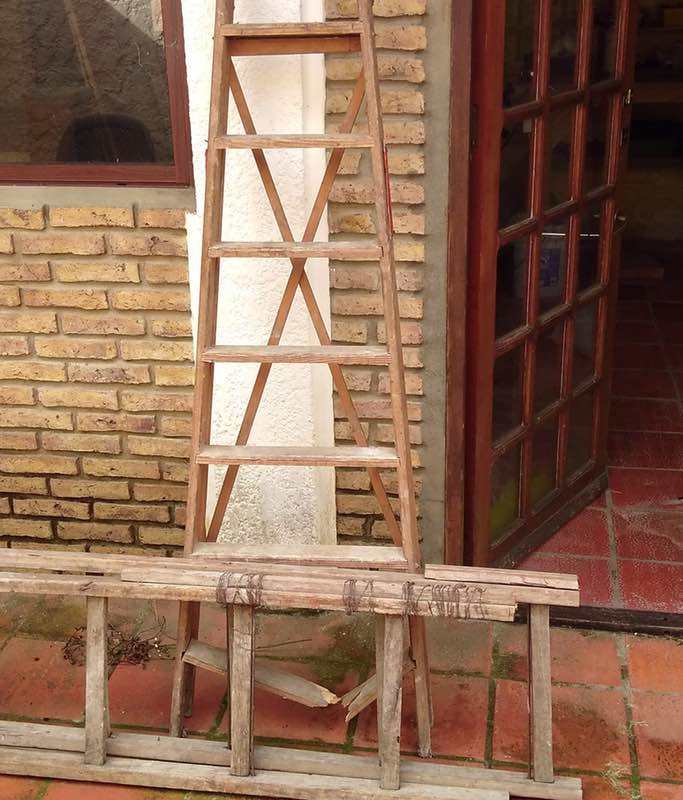
Today I brought home two ladders (one on the ground cut in two pieces to fit in the car). The vertical one is completely ruined by bugs — notice the bottom rung, broken from just a little weight.
The one on the ground is equally scary. All that wire desperately wound to hold the thing together. That could be ten years old. More likely 15 or 20. Or more: the house was built in the 1960s.
Astillas? Kindling. My next fun-with-dangerous-power-tools project!
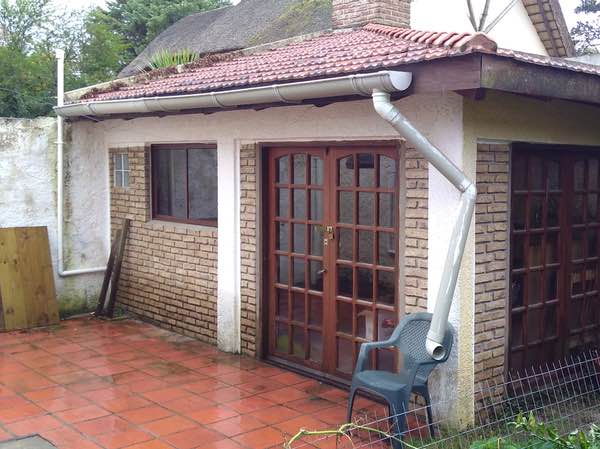
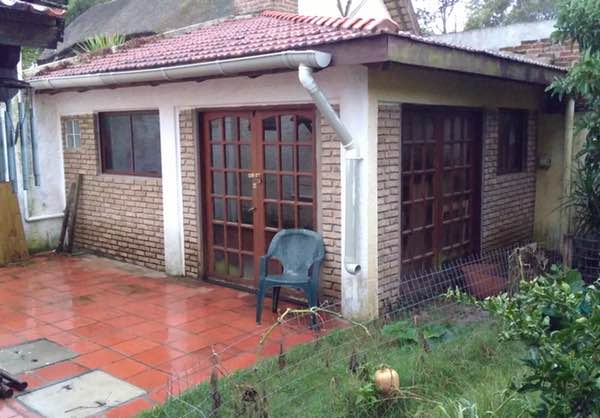
Several years ago, a departing northerner gave me a short length of plastic gutter, hangers, and a couple other pieces which I installed on our barbacoa. Recently I’ve been inspired — mostly by the unexpected gift of an extra 3-meter gutter section by apparently incompetent employees in a local business that I’m told is a front — to expand it to the full length of the barbacoa. With rain coming yesterday evening, I was eager to get it put together.
This is a little better, but I’m still not finished. Despite finally learning how to drill holes in walls correctly, I must have hit iron inside the concrete column on one side, so the bracket is more decorative than functional at this point. And maybe I need to splurge on another hanger for the downspout end. Oopa!
Why does the downspout end at knee level, instead of ground level? Well, to paraphrase Donald Rumsfeld, — no, I really don’t want paraphrase that hideous creature who unleashed the neurotoxin aspartame on the world — let’s just say “I worked with what I had.”
A few years ago, I looked into buying replacement plastic door shelves for our Bosch (not a good brand when licensed to Brazilians, unfortunately) refrigerator, and they were available from a place in London. I put it off, though, and discovered a year or two ago that they are no longer available for our model. Uh-oh.
But our refrigerator guys were here at some point last year installing a DC split (heating/cooling) unit in our bedroom. DC because a DC motor can be variable speed, unlike AC, so you don’t get crazy noise, and temperature fluctuations. This is helpful if, for example, you’re trying to sleep. We put the previous unit downstairs in the dining room, where it performs admirably despite its diminutive size.
I asked the refrigerator guys about the plastic door shelves. And as an aside pointed out the long dent in the side of the refrigerator that had appeared after they removed it for repairs, a year or three before. The more senior of the two, in his 30s, was horrified at that revelation and offered to fix the shelves for free with epoxy. Can’t complain!
Well, yes, actually can, even for a free job, where a few days turns into a few weeks, and we have to wait a few further weeks for the sticky epoxy to set, since apparently mixing equal amounts of Part A and Part B (thoroughly) presents challenges I am unable to fathom.
Alas, yesterday we realized that the bottom shelf was falling apart, probably because it’s the recipient of the heaviest loads. I consulted with Nico, font of knowledge specializing in the Uruguayan knack of fixing anything with anything, and he suggested I heat plastic with a candle to bend it. (Last time I heated plastic to bend it was around 1974, working in a screen printing shop and making little countertop displays.) I had leftover acrylic from fixing shattered glass in a door window in a casita where a certain muchacho lived for several years, and it worked like a charm. Well, excepting soot.
Of course this involved fun with dangerous power tools, in this case my table saw with all safety “features” removed immediately. I marked the depth of each tab cut with a marker. The only problem I had was lifting one tab to put epoxy underneath. It was tight and broke. But there are ten others that “have its back.”
We bought an old barbecue grill from some Americans who left a couple years ago. When the stamped-metal burner rusted through and fell apart, I tried finding a replacement. Alas, nothing for that model was any longer available from Sears.
But obviously had been — and needed — before. None of this handwriting is mine.
A friend who is an accomplished metal worker offered to fabricate one, but it turned out the only way to get a suitable piece of tubing was to buy 6 meters of it. Instead, he found a place in Montevideo that made one for $2,500, about USD 89.
That seemed like a lot, and only now did I try again to find a replacement part online. The closest I can find on thebbqdepot.com is something I can’t be sure is the correct part, and I would have to find someone to bring it from the U.S., and — drumroll please — costs almost as much!
And would eventually need to be replaced again.
In contrast, this galvanized burner built in Montevideo will certainly outlast the rest of the grill! Better still, because of the way they made the feeder tubes, it was simple to install. The original part was quite fussy.
Now I am curious what it might cost to fabricate a cooking grid locally, with stainless steel….
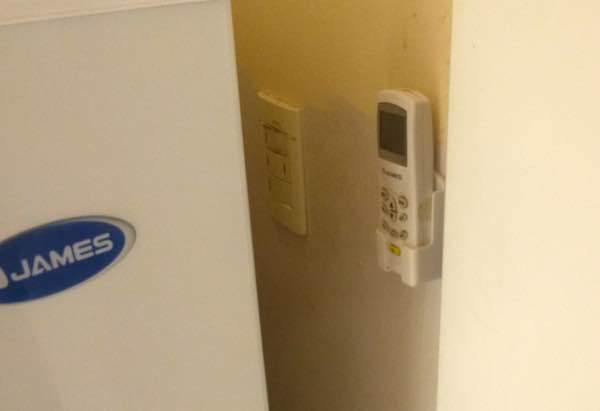
When we installed an “inverter” split (DC, variable, no motor noise) in our bedroom, we moved the noisy split (AC/heater/dehumidifier) unit to our dining room. Finally, today, I mounted its remote control to the wall, removing two pieces of clutter from the counter top.
But that’s not the story. In north North America, hanging something on a wall is pretty simple, dealing with drywall and (usually) wood studs. In south North America, and South America, our home for ten years, you deal with a different situation: plaster and brick walls. In Uruguay the requisite plastic expanding anchors are called Tacos Fisher, and I’ve often found myself sticking wood slivers or broken toothpicks alongside them because the hole ends up too big.
Until I figured it out.
To install a wall anchor, do not drill a hole.
This will be obvious to a machinist, or someone who has worked a lot with metal, but I am neither. You don’t drill a hole: you drill a hole twice, the first time with a smaller drill bit. You then use the proper-size drill as a reamer.
Voilá!
I can’t believe it took me over nine years to figure that out :0
I’m making another 1-meter hanging shelf for under the kitchen cabinets. I bought a piece of 1″ x 10″ pine, a bit longer than needed (so I can trim the ends square with my table saw, since the good ol’ boys at the aserradero don’t quite grasp the concept of “right angles”). Then, of course, there’s lots of sanding to get rid of various planer marks. Fortunately, I have a hand-held belt sander that makes quick work of such chores. At least until almost finished, when it suddenly stops working.
Well, with not much left to do, I wasn’t bothered at having to use my much-less-competent palm sander. Well, to clarify, much less competent when they both work. Instead, I found it to be equally competent: instead of sanding, it just made noises. Might as well have been dead as the other.
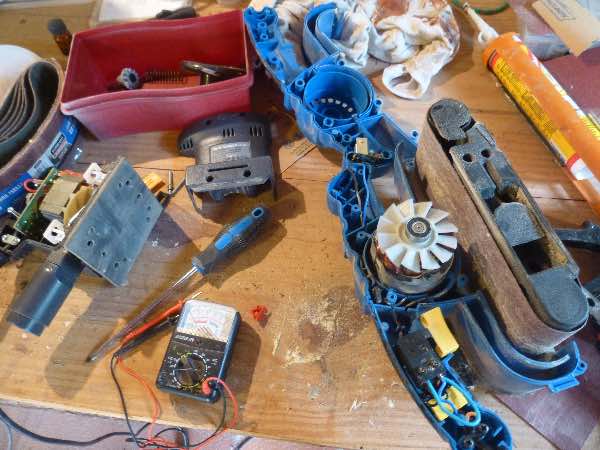
A few days later (today), I decided to tear into them and see what I could.
The palm (orbital) sander, to the left of the screwdriver, was hopeless. Something’s jamming the central shaft, and I have not a clue what (nor why it didn’t the last time I used it, a while ago). A path forward wasn’t immediately evident.
On the belt sander, however, I found it is activated by a double-pole switch — basically two switches acting together, one for each incoming live wire (and they’re both live in Uruguay, so I tend not to do “simple repairs” to light fixtures or outlets without first turning off the entire house circuit). Easy diagnostics revealed one switch wasn’t working, so I installed a jumper wire (turquoise “U” at lower right) so that the connection is always on, and — ta da! — it worked, and I replaced twelve screws that hold the two halves together.
Turned it on, finished my sanding job, turned it off — uh, no. Now the switch is jammed “on.” But guess what? I don’t really care! Unplug it to turn it off. It works!
I won’t be tempted to tear it apart again because, being a cheap no-brand tool, the screws that hold it together anchor into the plastic molding of the other half. They were all nice and tight when I undid them, but only a third of them really firmly reconnected. The others just turned and turned.
So it may end up being held together with wire and duct tape. But it works — !
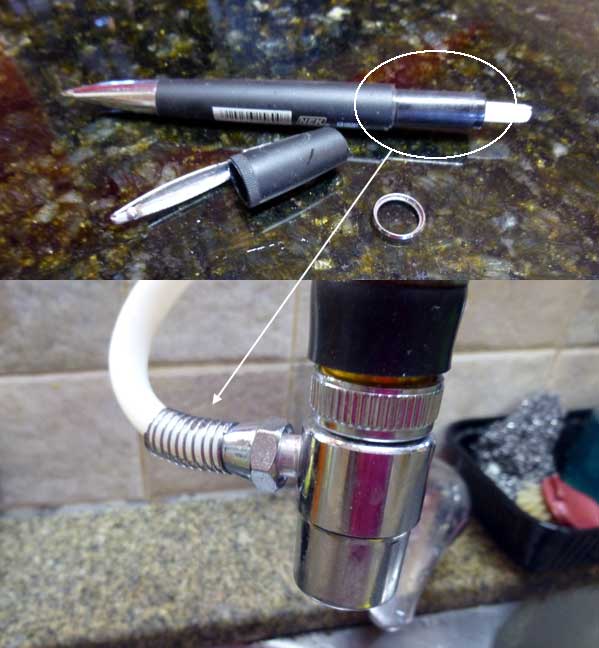
A few years ago, in Buenos Aires, our friend visiting from New York couldn’t believe the little things people were selling on buses, everywhere. “Who would buy a ball point pen?” she wondered. “I just did,” I replied, “I forgot to bring one.”
So couple years later in Manhattan, she emptied her “excess pen” drawer and we returned to Uruguay with a plastic bag full of pens.
Recently, though, that one from Buenos Aires has been my favorite, so I was slightly saddened to throw it in the trash when it ran dry (I might have replaced the guts, but that didn’t seem possible.) Until I realized: WAIT! That spring! Exactly what I’ve been look for to keep our water filter tube from crimping!